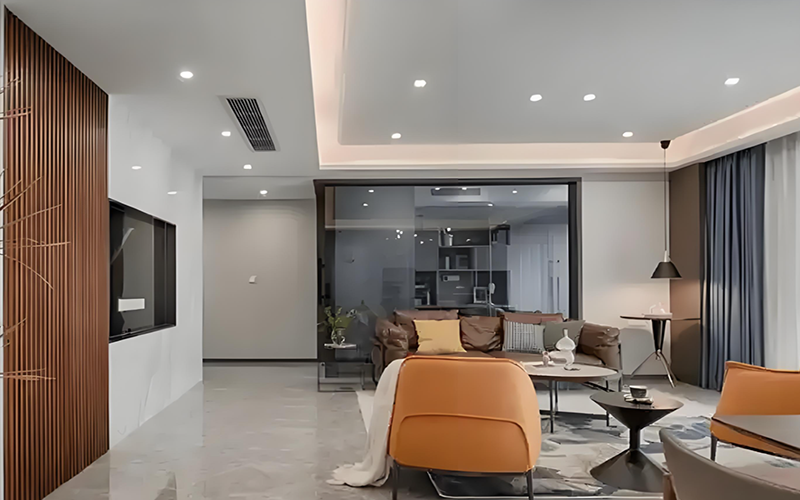
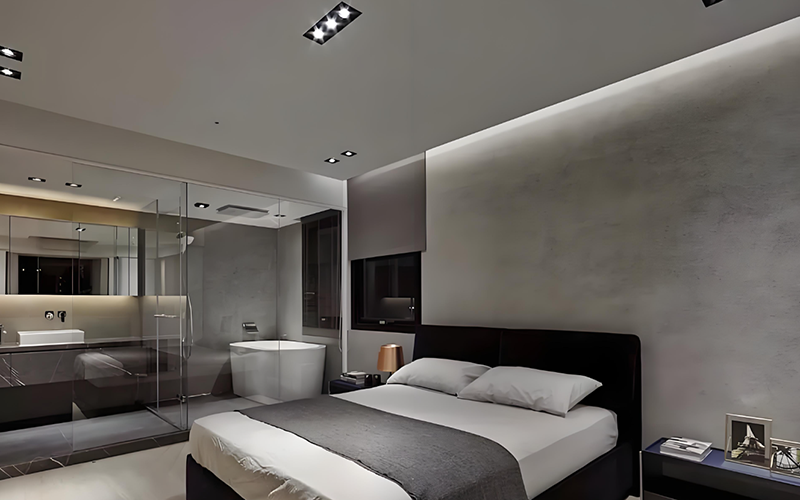
Ceiling lighting is a trendy lighting method. Do you want to install LED aluminum profile on the ceiling for indoor lighting? Installing LED light strips and LED aluminum profiles on the ceiling is a very fashionable and modern lighting method.For ceiling lighting design, pls also read How to Choose LED Aluminum Profiles for Ceiling Design?
Because installing LED aluminum profiles on the ceiling can change your lighting space, it is mainly used for mood lighting. It also provides a clean, integrated look. Whether you are updating your indoor lighting or working on an architectural lighting project.
Planning Your Installation
Measure the Space
Before you begin the installation, accurately measure the area where you plan to install the LED aluminium profiles. Use a tape measure to determine the length of profile you need and make sure it will fit in the space. Consider any obstructions, such as light fixtures or ceiling beams, that may affect placement.
Choose the Right Profile
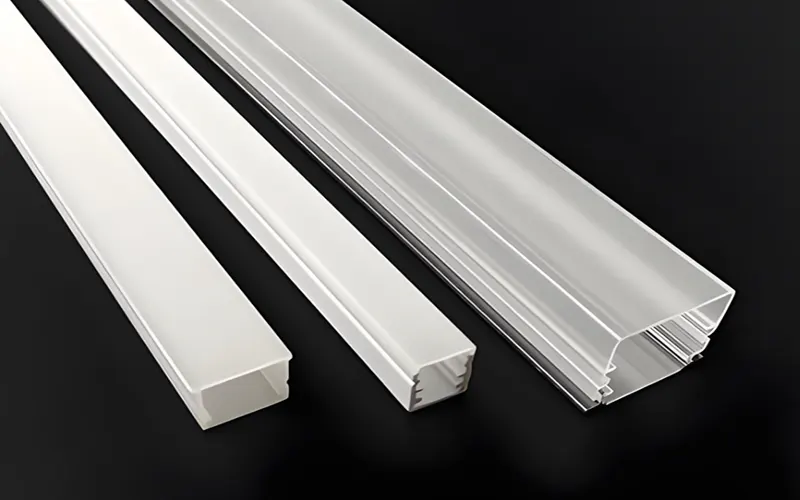
Choose an LED aluminum profile that fits your specific needs. Profiles come in a variety of shapes and sizes, including surface-mount, recessed, and pendant options. Choose a profile that matches your ceiling type and desired lighting effect.
Design Considerations
Plan the layout of the profiles to ensure even lighting and a unified look. Determine the spacing between profiles and how they align with other design elements in the room. Sketching out the layout helps visualize the end result and eases the installation process.
Prepare the Ceiling
Ceiling Types and Preparation
Before ceiling-mounting lighting, accurately measure the area where you plan to install the LED aluminum profile. Use a tape measure to determine the profile aluminum length you need and ensure it will fit in the space. Consider any obstructions, such as light fixtures or ceiling beams, that may affect placement.
Choose the Right Type of Profile
Based on your ceiling type, choose an LED aluminum profile that fits your specific needs. Profiles come in a variety of shapes and sizes, including surface-mount, recessed, and pendant options. Choose a profile that matches your ceiling type and desired lighting effect.
Even Lighting and a Uniform Look
Plan the layout, color, and application of the profiles to ensure even lighting and a unified look. Determine the spacing between profiles and how they align with other design elements in the room. Sketching the layout helps visualize the end result and simplifies the installation process.
Installing LED Aluminum Profile to Ceiling
Installation Methods
There are many ways to install LED aluminum profiles. These include using adhesive backing, screws, or clips. Adhesive backing is ideal for smooth, clean surfaces. Mounting clips are generally recommended, as screws or clips provide a more secure fix, especially for heavier profiles.
Step-by-step Installation
- Mark Location: Mark the mounting points on the ceiling according to your layout plan.
- Attach Mounting Hardware: Install any necessary mounting hardware, such as brackets or clips, making sure they are level and secure.
- Secure Profile: Secure the LED aluminum profile to the mounting hardware or adhesive backing, carefully aligning it with the markings.
- Check alignment: Use a level to make sure the profile is straight and make adjustments as needed before completing the installation.
Wiring and Connecting LED Strips
Prepare the LED Strips
Cut the LED strips to the desired aluminum length, making sure they fit the LED profiles exactly. Strip the wire ends in preparation for connection.
Wiring Techniques
Connect the LED strips to the power source following the manufacturer’s instructions. Make sure all connections are secure and insulated to prevent short circuits. Use connectors or soldering to make a reliable electrical connection.
Test the Lights
Once everything is connected, turn on the power and test the LED strips to make sure they are working properly. Check for even light distribution and make any necessary adjustments.
Finishing Touches and Maintenance
Add Diffusers
Install diffusers on profiles to enhance light diffusion and reduce glare. Choose from options such as clear, frosted, or opal diffusers, depending on your lighting needs and aesthetic preferences.
Cleaning and Maintenance
Clean profiles and diffusers regularly to maintain their appearance and performance. Use a soft, dry cloth to remove dust and debris. Inspect profiles regularly to ensure they are securely mounted and free of damage.
Common Problems Troubleshooting
- Uneven Lighting: Check the alignment of the profile and adjust as needed. Make sure the LED strips are evenly spaced within the profile.
- Light Flickering: Check all connections and the LED strips. Also, check for any damaged components or malfunctioning strips.
- Overheating: Make sure there is adequate ventilation around the profile and check for any obstructions that could prevent heat dissipation.
Conclusion
Installing LED aluminum profiles on the ceiling can greatly enhance the lighting and aesthetics of a space. By carefully planning the installation, preparing the ceiling and following the correct installation and wiring procedures. We have a wide variety of LED profiles for you to choose from, and there is no MOQ, and samples are free for you to choose from. Please let us know if you have any requirements.
FAQs
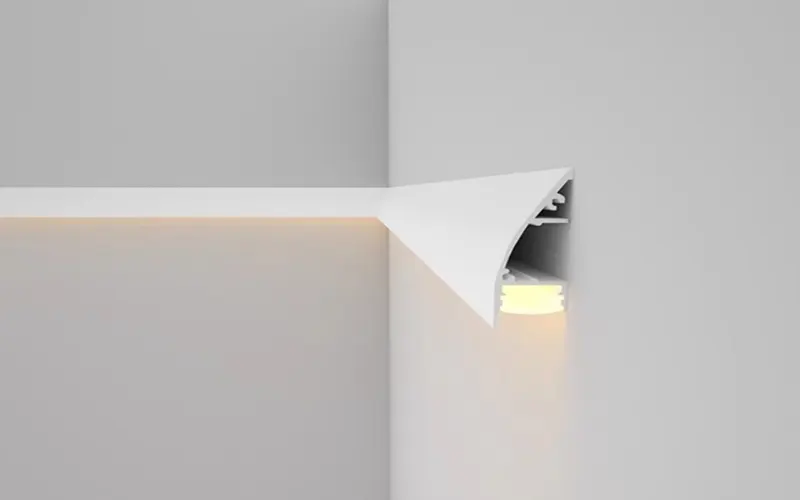
There are many types of LED profiles that can be used for ceiling lighting, the most common types include: Recessed profiles – mounted flush with the ceiling for a seamless look. Surface mounted profiles – mounted directly on the ceiling surface. Also popular are suspended profiles – suspended from the ceiling to create a chandelier effect.
Yes, choose recessed aluminum profiles designed for drywall installation. Secure with screws or drywall anchors before inserting the LED strip.
Because it is a low voltage LED light strip, the power supply needs to be converted. Connect the LED strip to a 12V, 24V or 48V power supply (based on the strip specifications). Then run the low-voltage wires through the ceiling to hide them.
It is best to use one, because the diffuser cover protects the LED strip from dust and moisture. It also softens the light and eliminates harsh glare.