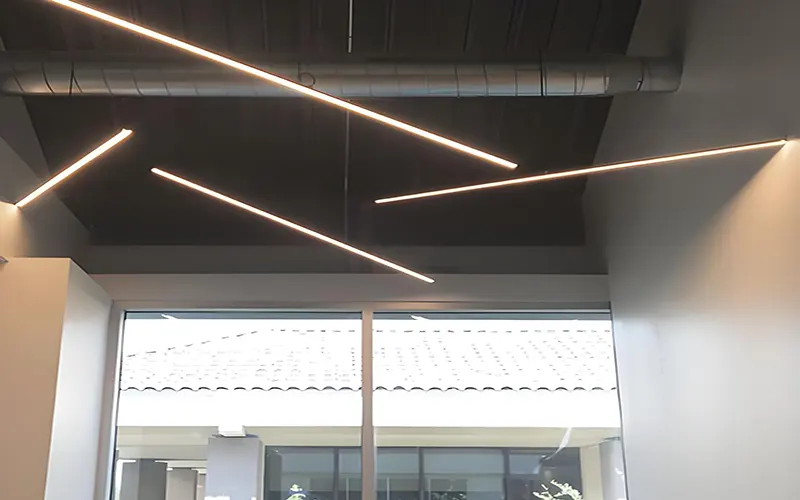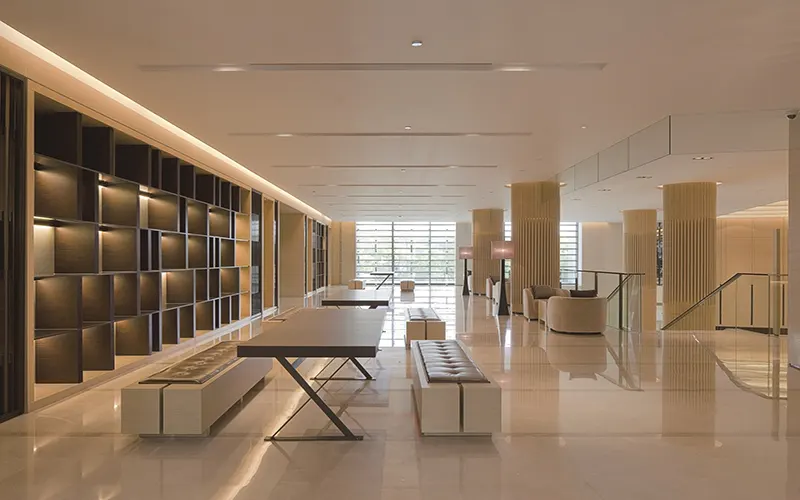
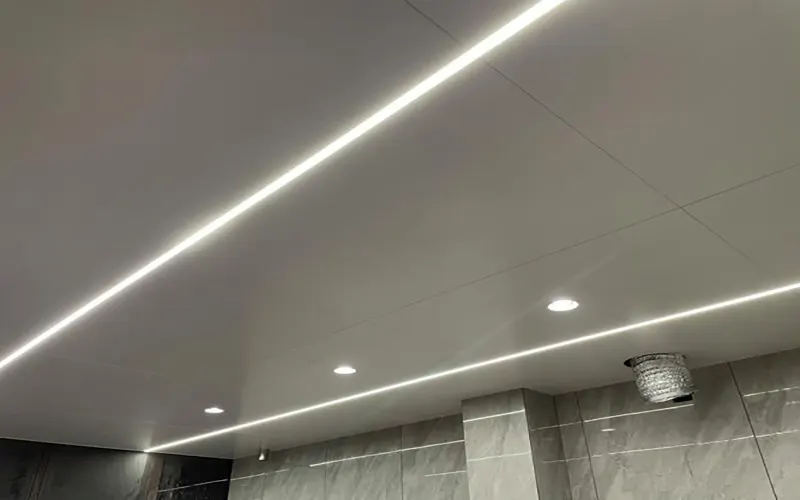
Recessed drywall LED profile (also known as “plaster-in LED channels”) are aluminum frames designed to be embedded directly into drywall. Once the edges are covered with joint compound, sanded, and painted, the profile becomes completely invisible, creating a flush, integrated lighting channel that blends seamlessly with the architectural structure.
This guide provides a detailed overview of recessed drywall LED profile, explains how they differ from standard profiles, and outlines key installation steps and finishing techniques to achieve a high-end, seamless lighting solution. More details, pls read 2024 Ultimate Guide for LED Aluminum Profile
What is a Trimless Recessed LED Profile?
A recessed drywall LED profile is an aluminum channel specifically designed for installation within a drywall structure (such as a ceiling or wall).
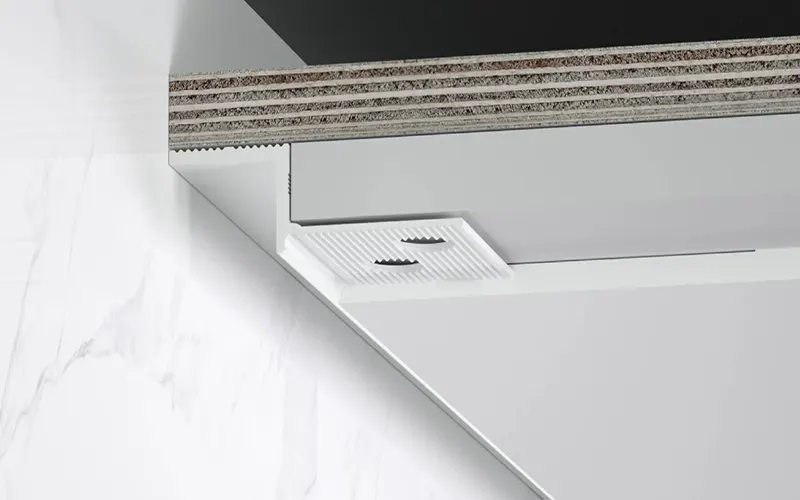
Unlike standard surface-mounted or flanged profiles, trimless profiles are installed behind the drywall surface and lack traditional mounting flanges.
The defining feature of trimless recessed LED profiles is their perforated or angled side wings. These wings extend outward from the central LED channel and feature small holes, elongated slots, or serrated edges.
Their function is straightforward: to provide an anchoring point for drywall joint compound (commonly known as “mud”). Once the profile is secured, installers apply compound over the wings to create a smooth transition—or “feathered” edge—with the surrounding surface, followed by sanding and painting.
The final result is a perfectly flush transition between the aluminum and the drywall, with no raised edges or visible metal frames.
Comparison: Trimless Profiles vs. Standard Flanged Profiles
If you have ever purchased LED profiles, you have almost certainly seen standard flanged profiles (also known as “surface-mount” or “flanged recessed” types). These profiles typically feature a visible aluminum frame ranging from 5mm to 10mm in width; this frame is known as a “bezel.”
The Visual Impact of a Bezel
The surround acts as a visual boundary and features “wings.” Additionally, it introduces a metallic line that—even if you attempt to color-match it to the vehicle’s paint—may still clash with the body color.
Side-by-Side Comparison
| Feature | Trimless (Recessed Drywall LED Profile) | Standard Flanged Profile |
| Visible frame | None – completely hidden | 5–10mm metal bezel |
| Finish options | Painted drywall (any color) | Raw aluminum, white, or black |
| Installation complexity | Higher – requires mudding & taping | Lower – screws or clips to surface |
| Drywall prep needed | Yes – channel cut or backing installed | No – mounts over existing drywall |
| Best for | High-end residential, galleries, luxury retail | Workshops, cabinets, garages, offices |
| Cost | Higher (profile + labor) | Lower |
| Ability to repaint | Yes – repaint ceiling anytime | No – bezel color is fixed |
Trimless vs. Standard Flanged Profiles: Why Bezel-Free Matters
When selecting lighting profiles, the distinction between “flanged” (with a visible rim) and “frameless” designs significantly impacts the final visual outcome. Naturally, the right choice depends on your specific requirements.
- Standard Flanged Profiles: These profiles feature a visible edge (or flange) that sits atop the drywall surface during installation, concealing the cut edges. While relatively easy to install, they create a visible break in the ceiling plane and a slight protrusion.
- Trimless LED Profiles: By eliminating the frame, the lighting appears as if it is directly embedded within the architectural structure, creating a seamless integration between the building and the product.
Why choose a trimless LED profile design? It offers a cleaner, more professional aesthetic without disrupting the architectural lines of the interior.
How to Install Recessed Drywall LED Profile? (A Step-by-Step Overview)
Installing Recessed Drywall LED Profile is not a DIY project for beginners, but it is entirely achievable for experienced home renovators or professional drywall installers. Below is a general overview of the installation process.
Tools You Will Need
– Trimless recessed LED profile(s)
– LED strip, driver, and wiring
– Drywall saw or rotary cutter
– Wood or metal backing (blocking)
– Drywall screws (1-inch)
– Joint compound (setting-type, e.g., 45 or 90 minute)
– 4-inch and 6-inch drywall knives
– Sanding sponge (fine grit)
– Painter’s tape
– Primer and paint
Step 1: Framing & Backing
Before drywall goes up (or after cutting an existing ceiling), install solid backing where the profile will sit. The backing can be 2×4 lumber or metal channel. Screw the backing to joists or studs so it spans the entire length of the planned light slot.
Step 2: Cutting the Drywall Opening
If you are working with existing drywall, trace the profile’s outer wing width onto the ceiling. Use a drywall saw or rotary cutter to create a clean opening. The opening should be slightly wider than the wings to allow for mud.
Step 3: Securing the Profile
Place the trimless profile into the opening so its wings rest on top of the drywall edges (or behind them, depending on design). Screw through the perforated wings into the backing below. Use screws every 6–8 inches. Ensure the profile is perfectly straight and level.
Step 4: Masking the Channel (Critical!)
Apply painter’s tape over the open LED channel and the diffuser groove. This prevents joint compound from falling into the cavity. If mud gets inside, it is extremely difficult to remove and will block your LED strip.
Step 5: First Coat of Mud
Using a 6-inch knife, apply a thin coat of setting-type joint compound over the perforated wings. Do not try to cover everything at once. Work the mud into the holes so it mechanically locks onto the profile. Feather the edges outward onto the drywall.
Step 6: Second & Third Coats
After the first coat dries (typically 24 hours), sand lightly and apply a second, wider coat (using a 8 or 10-inch knife). Repeat for a third coat if needed, feathering further each time. The goal is a smooth, invisible transition from drywall to profile.
Step 7: Sanding & Priming
Once fully dry, sand the area until perfectly flush. Remove the painter’s tape from the channel. Apply a high-quality drywall primer over the mudded areas (do not prime inside the aluminum channel). Then paint the entire ceiling.
Step 8: Final Assembly
Install your LED strip inside the LED aluminum profile, connect it to the driver, and snap in the diffuser. Turn on the power.
Drywall Finishing Techniques: Avoiding Cracks
The success of a trimless lighting system depends largely on the quality of the finish. If the gypsum board is installed improperly, visible seams or cracks may appear later on.
1. Use High-Quality Joint Compound
A flexible, durable compound reduces the risk of cracking due to temperature changes or structural movement.
2. Apply Multiple Thin Layers
Instead of one thick coat, apply several thin layers, allowing proper drying between each.
3. 3. Reinforce with tape or mesh tape
Apply drywall joint tape along the edges of the profiles to reinforce the joints and prevent cracking.
4. Sand evenly until smooth
Uneven sanding can cause edges to show or create shadows when the lights are turned on.
5. Allow sufficient drying time
Rushing the application process can lead to shrinkage cracks and surface imperfections. Therefore, wait for the paint to dry before proceeding to the next step.
6. Apply a primer before the topcoat
Primer ensures uniform paint absorption, resulting in a consistent finish.
Best Applications for Recessed Drywall LED Profile (Room-by-Room Guide)
Frameless recessed profiles are versatile, but they excel particularly in specific application scenarios. You can refer to the installation scenarios below.
Living Room
Optimal Installation Locations: Recessed channels along the top of the wall, ceiling coves surrounding the TV feature wall, or linear light channels above the curtains. Pair with a frosted finish to create soft ambient lighting.
Recommended Reasons: Frameless light channels produce glare-free, indirect lighting. Opting for a color temperature of 2700K to 3000K fosters a warm, cozy atmosphere, making the living room feel more spacious and creating a relaxed vibe.
Kitchen
Optimal installation locations: beneath upper cabinets (horizontal channel), above the kitchen island (centered single channel), or at the toe kick. Frosted finishes are recommended for functional lighting, while transparent finishes suit an industrial aesthetic featuring visible LED dots.
A color temperature of 3000K to 3500K (neutral white light, suitable for food preparation) is ideal. For frameless under-cabinet installations, mount the profile flush with the bottom of the cabinet to prevent protruding edges from accumulating grease or debris.
Bathroom
Optimal installation locations: vertical light channels on either side of the mirror (for facial illumination), ceiling light channels above a freestanding bathtub, or wall niches in the shower area. Frosted finishes are recommended. For wet areas, use profiles with an IP65 rating and sealed end caps.
If installing in the shower area ceiling, use moisture-resistant profiles paired with silicone-encapsulated LED strips (rated IP65 or higher).
Foyer and Hallway
Optimal Layout: Install a continuous recessed light channel running the length of the ceiling, centered along the circulation path. A frosted finish is preferred to ensure uniform lighting (color temperature of 2700K to 3000K).
Design Advantage: The trimless light channel creates a sense of visual extension, making narrow hallways appear more spacious.
Bedroom
Ideal installation locations: behind the headboard (in a wall recess), in a recessed cove along the ceiling edge, or as a “canopy of light” above the bed. Frosted finishes are recommended to ensure the light is soft and glare-free upon waking.
Pair with a dimmer switch. While trimless fixtures look stunning at full brightness, the atmosphere they create at 10% brightness—perfect for late-night relaxation—is truly magical.
Home Office
Recessed ceiling light troughs running parallel to the desk (to minimize shadows on documents) or vertical light troughs positioned on either side of the monitor. Frosted finishes are ideal (to reduce screen glare).
Compared to overhead point-source lighting, a 4000K color temperature is preferable (cool white light aids concentration). This type of lighting provides uniform, continuous illumination, effectively reducing eye strain.
Art Gallery
Optimal placement: In a wall recess, allowing light to be projected vertically onto the artwork. Choose either clear lenses (for crisp light-and-shadow edges) or frosted lenses (for a soft wall-washing effect).
Color temperature 3500K to 4000K (neutral tones to ensure accurate color rendering). Use high-CRI (CRI 90+) LED strips to ensure the artwork’s colors are displayed accurately.
Conclusion
Recessed Drywall LED Profile are more than just lighting components; they embody a pursuit of architectural purity and aesthetic refinement.
By eliminating visible bezels and achieving a seamless transition between the profile edge and the plasterboard—followed by a final coat of paint—you can create a unified, integrated lighting effect.
Recessed Drywall LED Profile for plasterboard, and get free technical support from our lighting experts.
FAQs
Yes, their installation is more complex than that of surface-mounted profiles and requires professional installers. These profiles must be installed during the drywall construction phase, requiring precise alignment, proper wiring, and professional plastering.
A “plaster-in profile” is a type of recessed profile specifically designed for trimless installation. While all plaster-in profiles are recessed profiles, not all recessed profiles offer a trimless finish.
Cracking can occur if the installation is improper. You can significantly reduce the risk of cracking by using high-quality joint compound, applying thin layers in multiple passes, reinforcing the joints with drywall tape, and allowing sufficient drying time.
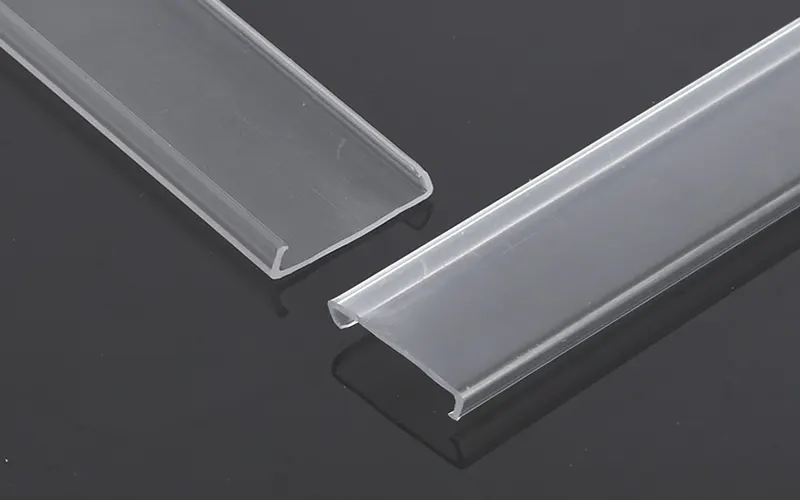
Yes. The PC diffuser features a “snap-in” design. You can easily remove it using a small flat-head tool to clean it or replace the internal LED strip.
The aluminum alloy profiles are inherently corrosion-resistant; however, when used in damp areas, they must be paired with waterproof LED strips rated IP65 or IP67.